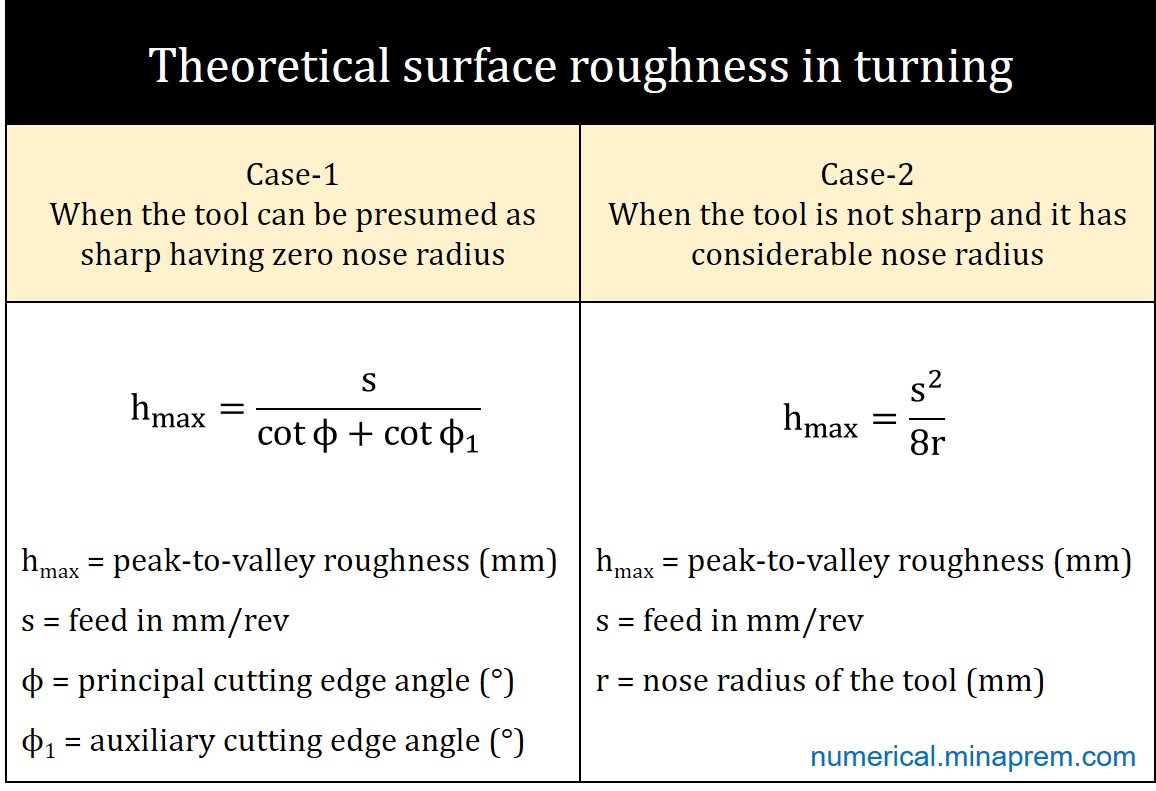
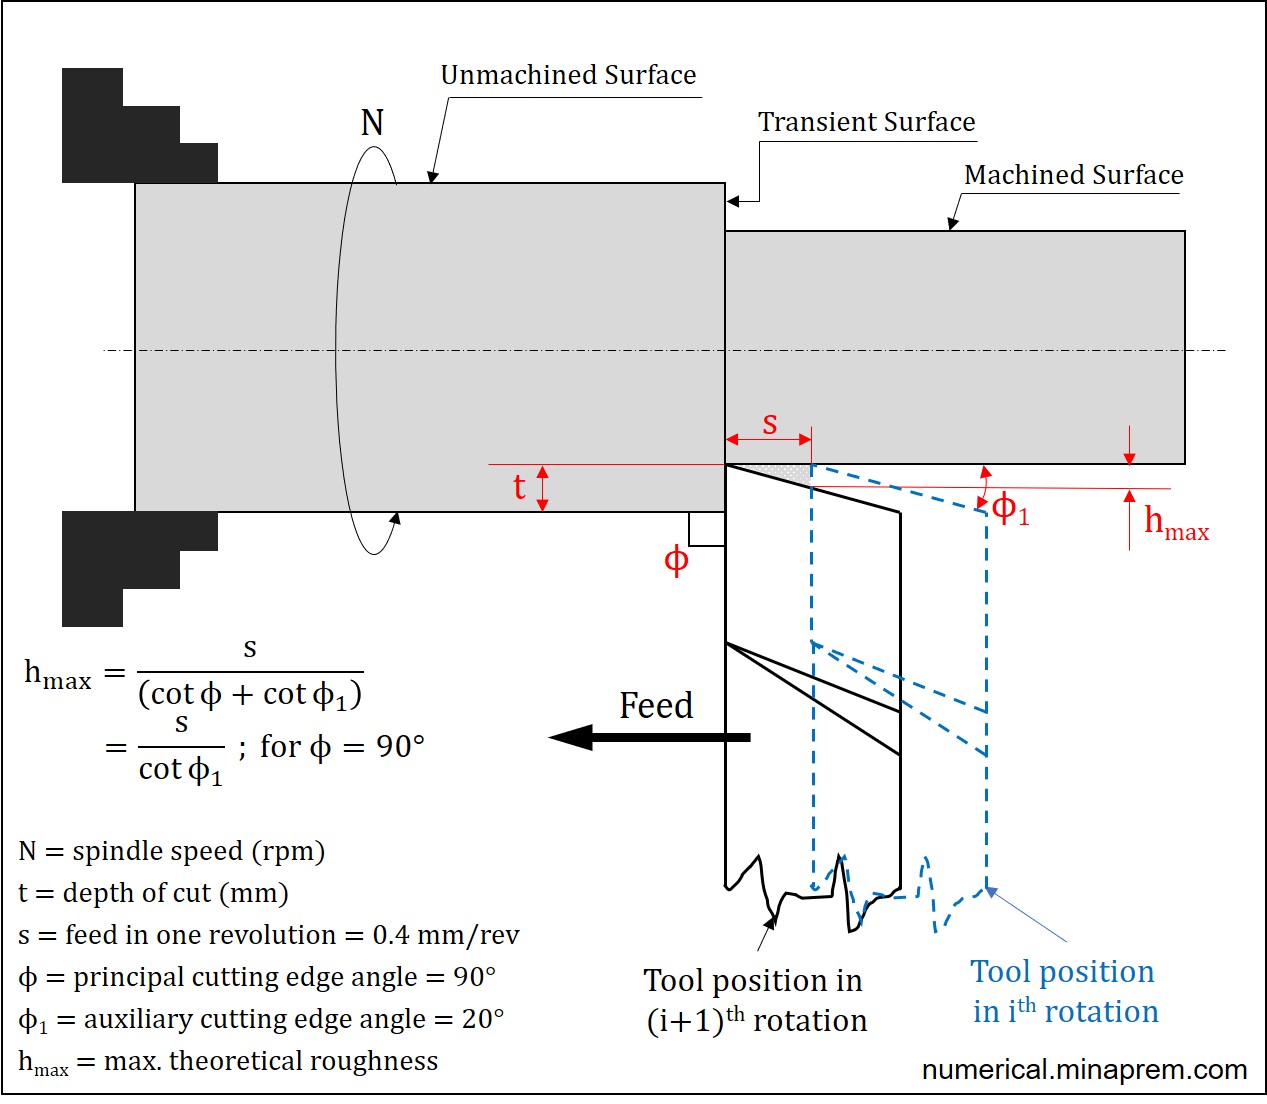
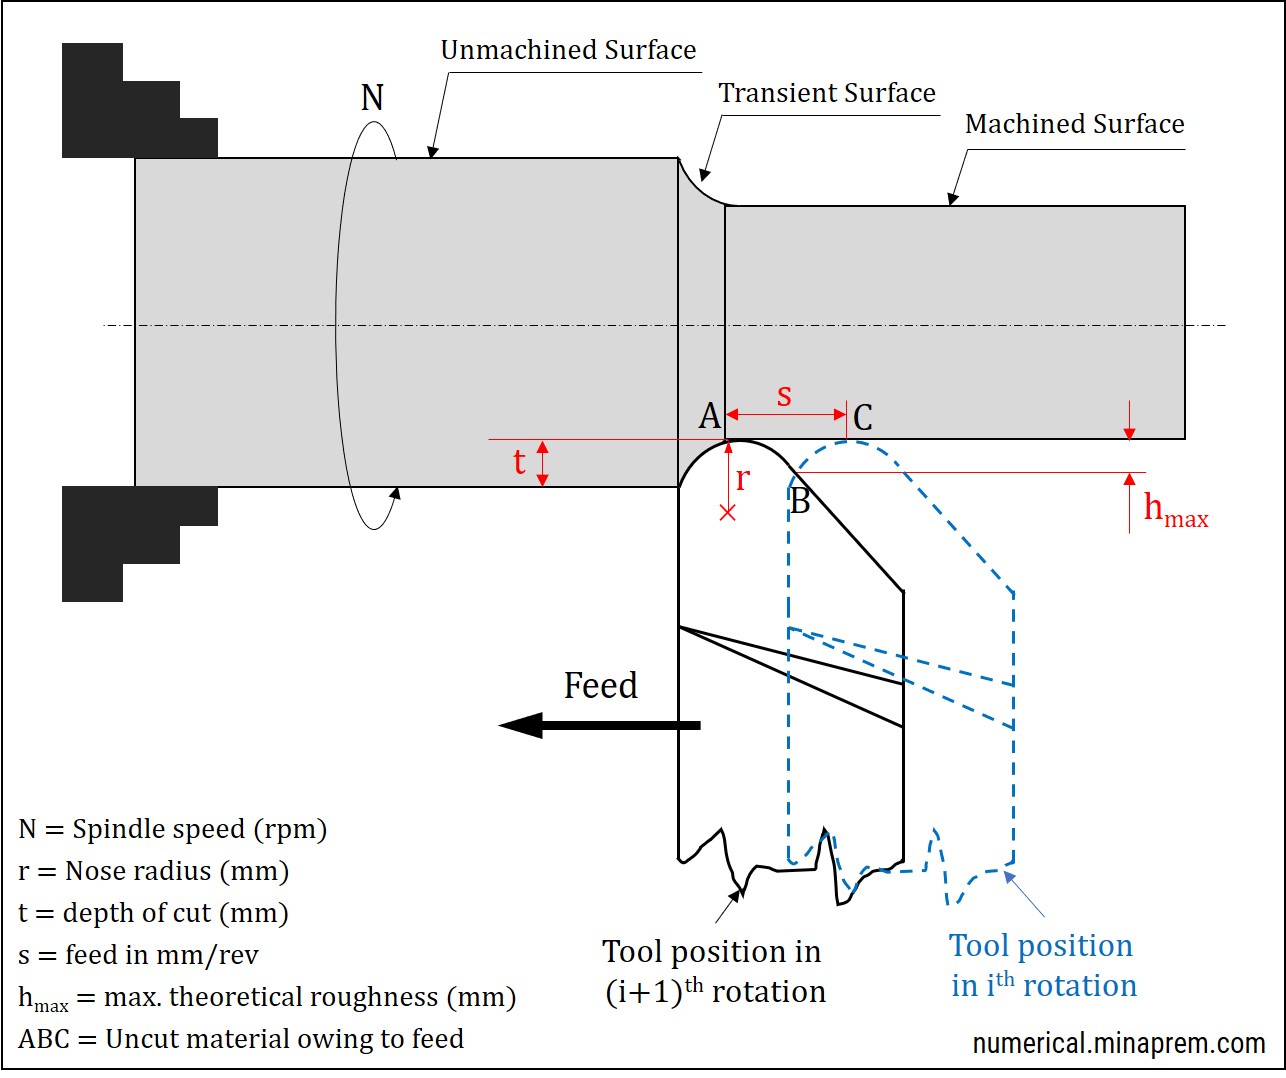
This question is related to the calculation of theoretical maximum surface roughness (peak-to-valley roughness) in straight turning operation. It has two different parts. In the first part, the cutting tool can be considered as sharp (and thus the nose radius can be neglected). In the second part, the tool has a substantial nose radius that should be taken into consideration for estimation of surface roughness. Before proceeding to the solution, let us first recapitulate the relevant formulas. In general, theoretical peak-to-valley surface roughness in turning can be estimated in two different ways, as shown below. The derivation of these formulas can be found here.

Step-1: Theoretical maximum surface roughness for sharp tool
For a sharp tool, the theoretical maximum surface roughness (hmax measured in mm) can be estimated using the feed per revolution (s measured in mm/rev), principal cutting edge angle (ϕ measured in degree), and auxiliary cutting edge angle (ϕ1 measured in degree) of the tool. All three values are clearly mentioned in the question. Thus, the theoretical maximum surface roughness can be calculated as follows.
Feed per revolution (s) = 0.4 mm/rev
Principal cutting edge angle (ϕ) = 90°
Auxiliary cutting edge angle (ϕ1) = 20°
\[\begin{array}{l}
{h_{\max }} = \frac{s}{{\cot \phi + \cot {\phi _1}}}\\
{h_{\max }} = \frac{{0.4}}{{\cot 90 + \cot 20}}\\
{h_{\max }} = \frac{{0.4}}{{0 + 2.75}}\\
{h_{\max }} = 0.145
\end{array}\]
Therefore, the calculated value of theoretical maximum surface roughness when turning tool is sharp is 0.1456 mm (= 145.6 μm).

Step-2: Theoretical maximum surface roughness for tool with nose radius
A different formula is used to estimate maximum surface roughness in turning carried out with a tool having significant nose radius, regardless of the value of tool cutting edge angles. In this scenario, the theoretical maximum surface roughness (hmax measured in mm) can be estimated using the feed per revolution (s measured in mm/rev) and nose radius (r measured in mm). Both the values are given in question. So roughness can be calculated easily, as shown below.
Feed per revolution (s) = 0.4 mm/rev
Nose radius (r) = 1.0 mm
\[\begin{array}{l}
{h_{\max }} = \frac{{{s^2}}}{{8r}}\\
{h_{\max }} = \frac{{{{\left( {0.4} \right)}^2}}}{{8 \times 1}}\\
{h_{\max }} = 0.02
\end{array}\]
Therefore, the calculated value of theoretical maximum surface roughness when turning tool has significant nose radius is 0.02 mm (= 20 μm). It is also interesting to note down the reduction in surface roughness when the tool is provided with a nose radius. This is one typical benefit of nose radius.
